Is It Hard To Roast Coffee Beans? (Plus How To Try!)
Coffee roasting can look mystifying, but it's not a complicated process.
In fact, it's surprisingly easy to try it for yourself using cheap equipment or even household items you already have! However, just because it's easy to start doesn't mean that is easy to master. Consistently excellent coffee takes a little study, a lot of practice, and some dedicated equipment.
Having roasted at home for several years, I clearly enjoy the process. But it has challenges (both fun and frustrating) that weren't obvious at first.
Here's whether it's difficult to roast coffee
It's easy to roast coffee beans yourself and get an acceptable result. But at first, it will be inferior to anything you'd buy from a good specialty café. That's very difficult to achieve, and some home roasters struggle to reach that level of consistency.
Decent roasts are easy, but excellent ones comes from tons of experience, ample patience, and (potentially) a lot of special equipment.
What's easy about it?
All you've got to do is apply heat to the beans inside some sort of container. They'll gradually dry out, caramelize, crack, and smoke, at which point they're (roughly) finished.
You can accomplish that with a skillet and lid over a burner, a cheap popcorn popper, or (if they're carefully distributed) in an oven or front-loading air fryer.
Technically, it takes nothing more than a heat source capable of a steady 450-500°F, something heat-proof to hold and agitate the beans, and patience.
The principle is easy to understand.
But you'll quickly find that roasting and roasting well are not the same thing!
What are the hard parts?
There are two fundamental challenges with coffee roasting. The first is understand how heat application, agitation, and/or airflow affect the roast. The second is basically the opposite: what does the taste of this roast tell you about what went right and wrong?
Then, as soon as you switch to a different bean or crop, the process of refining the roast starts all over again! Some of us find that fun; others would (understandably) prefer not to worry about those details.
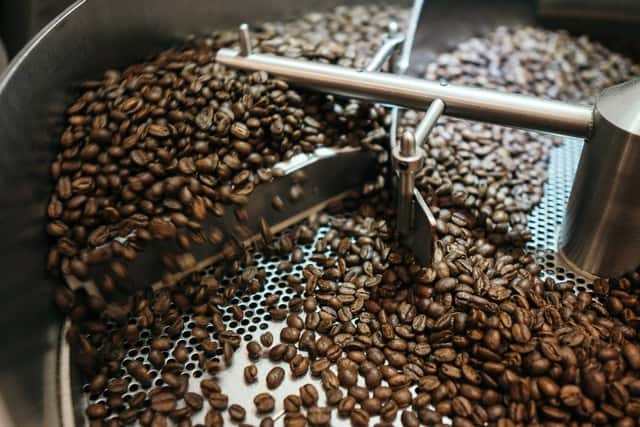
Even though large-scale coffee roasting looks like an industrial process, it's very much a craft that takes a long time to master.
There are also practical challenges like dealing with smoke and chaff, but those are far more easily solved.
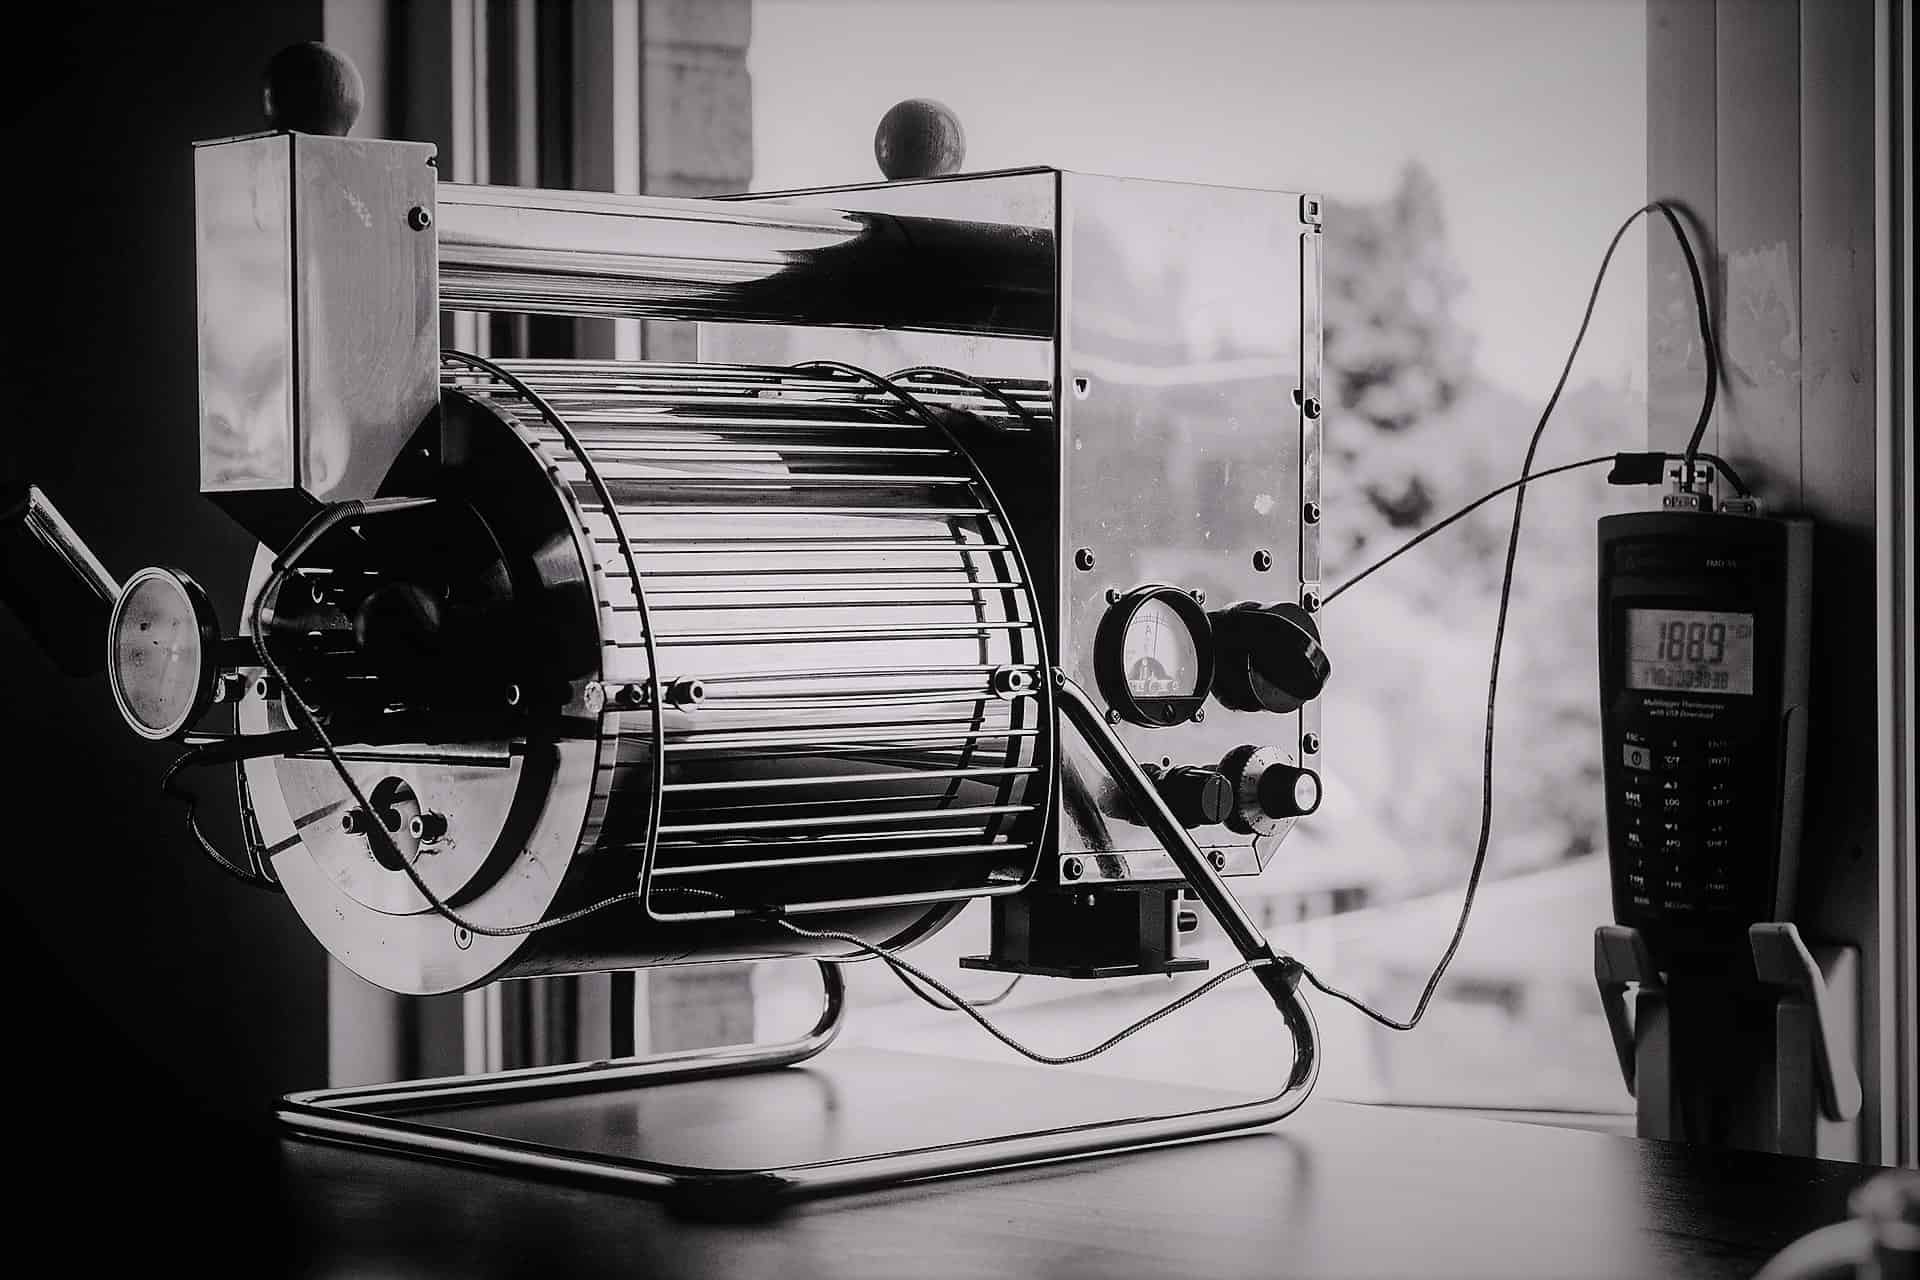
Measuring what matters
The rate of heat application, agitation, and/or airflow will make or break your roast.
With professional equipment, it's possible to measure and repeat all those parameters. There are knobs, buttons, digital readings, even LED screens and computer data feeds for every measurement you can imagine.
(It still takes a lot of experimentation, but eventually a pro roaster will have a well-refined "profile" to produce over and over again.)
But it takes money, ingenuity, or both to track these things at home.
How long does it take to roast coffee beans?
Roasting typically takes 10-20 minutes not including prep or clean-up. The type of roaster makes a huge difference, with fluid bed roasters generally faster than drums. The amount of coffee also matters, both in terms of absolute weight and relative to the roaster's capacity.
Ambient temperature, humidity, and the beans themselves also play a role.
Anything that requires manual agitation will be more variable, simply because we aren't robots!
And first-time roasters using a skillet will notice that its distance from the burner shortens or extends roasting by several minutes.
Popcorn air poppers—another cheap and popular home method—have no built-in control over temperature or fan speed, so roasting time depends almost entirely on the amount of beans you load.
Prep and clean-up range depend entirely on your roasting set-up. Large drum roasters need extended pre-heating and elaborate cleaning; a skillet is ready to go immediately.
Is it better to roast your own coffee beans?
The beans you roast won't be better than what good local roasters sell, but they might be surprisingly close for a much lower price.
And you can indeed save a lot of money by roasting at home with an entry-level roaster.
However, it's very time-consuming, so it's best to look at roasting as a hobby first and foremost.
Personally, I save about $10 per bag (or more) by roasting specialty coffee myself. But if I enjoyed inexpensive coffee like most supermarkets sell, then the savings just wouldn't be there.
It's a hobby with potential cost savings. It's not a personal finance strategy!
What's the best way to start home coffee roasting?
As I've alluded to, the most convenient way to start roasting is with a skillet and lid over a burner. (Gas is best, but electric can work.)
But if you want to take up home roasting as a hobby, then you'll have more fun (and better coffee) with a simple but dedicated roaster.
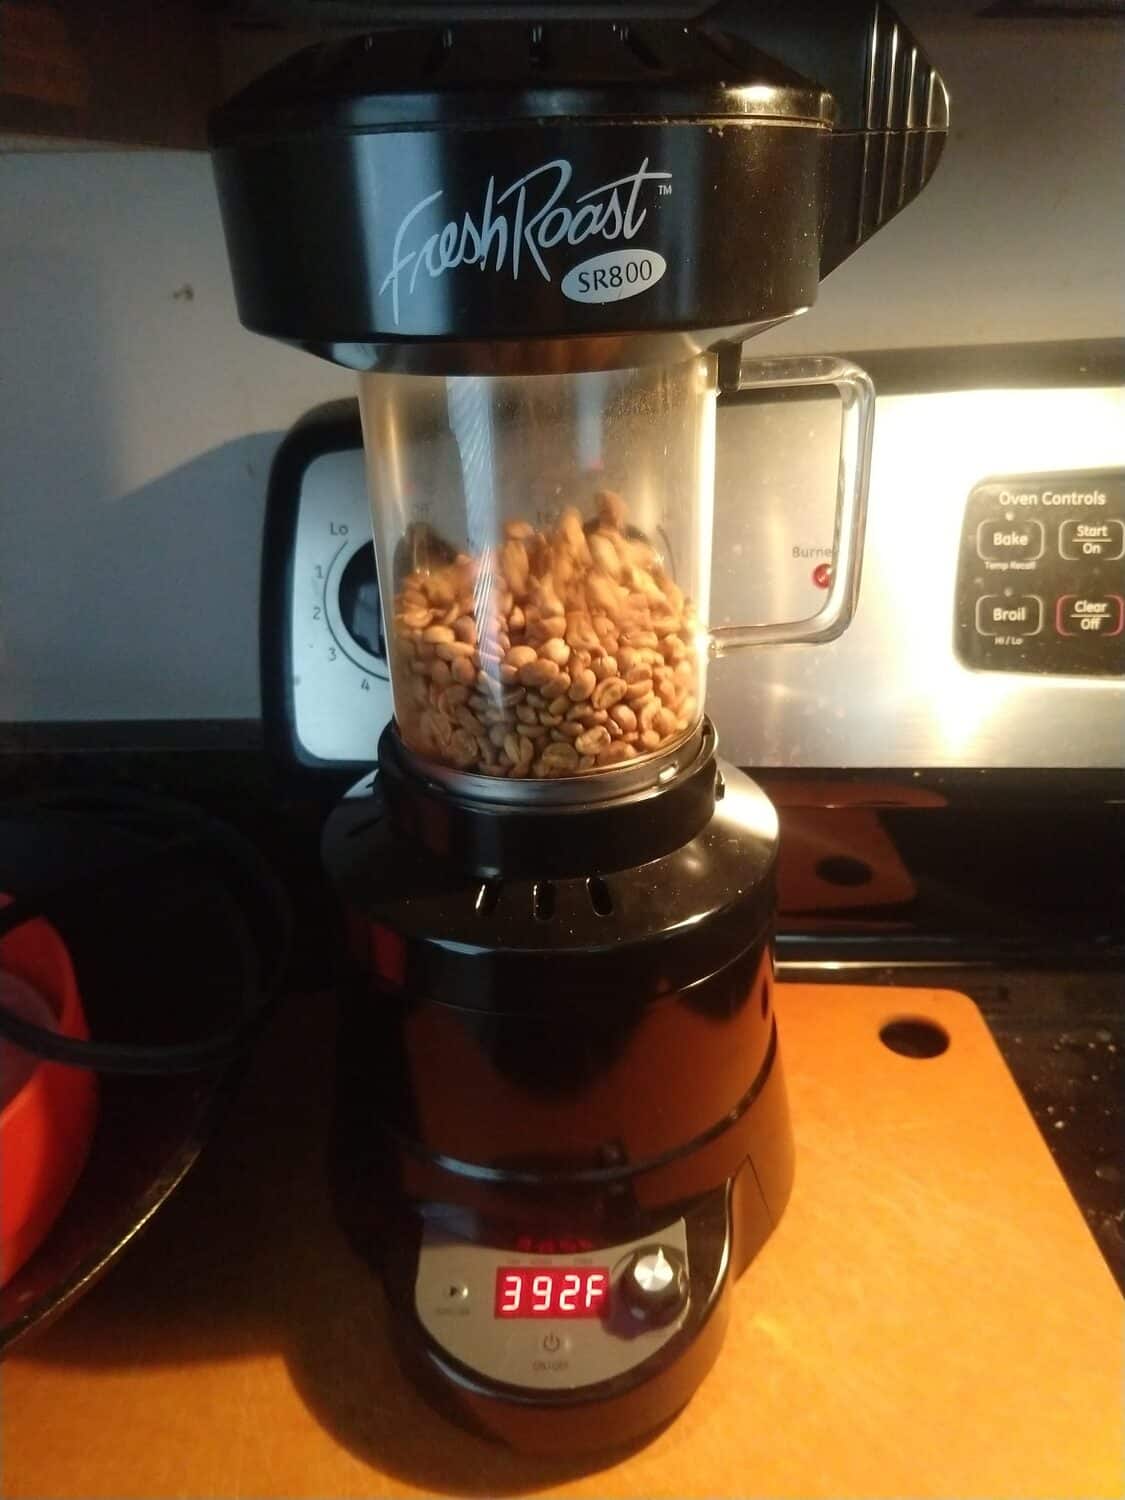
My suggestion is the Fresh Roast SR800. It's not the cheapest, but I've gotten better results more consistently than with any other inexpensive method. Check out this review to learn more.
Meanwhile, if you want to experiment with other free/cheap options, then below are some others you can start roasting coffee with.
You'll need some beans regardless, so for starters, order a sample set from Sweet Maria's.
First, one super-duper-ultra-extremely-important warning.
Chaff comes off of beans as they roast. It will definitely make a mess.
More importantly, it can start a fire if a large amount touches a heat source or blocks exhaust.
Keep a fire extinguisher on hand—even with actual roasters, but all the more with improvised ones.
Skillet
Pick a small skillet, since it will start feeling heavy!
- Put the lid on and preheat it over medium to high heat for 3-4 minutes.
- Pour in just enough green coffee to cover the bottom of the skillet in a single layer.
- Start shaking and swirling it, and don't stop! Take care to keep the lid in place. Use your free hand (wearing an oven mitt) if necessary.
- You should hear "first crack" (which sounds like popcorn) before 10 minutes. Turn up the burner and/or keep the skillet lower if that's not happening—and use that as a starting point for next time.
- Dump them them out when first crack settles down, or make a darker roast by keeping them going (at lower heat) until you hear the softer "second crack." The latter should happen by about 15 minutes at the latest.
- Put the beans on a baking sheet or in a colander to cool. Ideally, use a fan to expedite cooling. Just be prepared for chaff to fly everywhere!
Oven
Ovens vary enough that no single setting will work for everyone, so plan on experimenting.
That said, start with 475°F and adjust as much as 25° up or down depending on your results. You'll get the best results with a convection oven since it minimizes hot and cool pockets.
- Cover a baking sheet with a single layer of coffee beans and place it in the oven.
- Stir/spread them around with a wooden spoon after about 5 minutes, keeping just a single layer.
- Target first crack before 10 minutes. If you don't, then increase the heat by 25°F, and remember to start out 25° hotter next time.
This is one of the easier possible ways, but the lack of agitation makes it easy to scorch the beans. The dead giveaway is beans that are burned on just one side.
Frequently opening the door to move them will disrupt heating and may result in "baked" coffee, which is roasting jargon for a sort of papery, bland taste. A roast that doesn't hit first crack by about 10 minutes—or that drops off in heat too quickly near the end—can produce the same problem.
Air fryer
Front-loading air fryers are best, since you can keep a large amount of beans spread in a single layer.
All the better if it has a rotisserie. Its rotation prevents scorching, so you can simply dump them in and not worry about a single layer.
- Start a bit cooler than in the oven instructions: perhaps 450°F.
- Use roughly 1/2 lb of coffee to start with, but it will depend on your air fryer's capacity.
- Choose a moderate fan and rotisserie speed, if applicable.
- Increase fan and/or rotisserie speed to slow down roasting; decrease to speed up roasting. Adjust the temperature by 25° only if fan and rotisserie adjustment aren't enough.
- Target first crack before 10 minutes, as with other methods.
Hot-air popcorn popper
If you've got a popcorn popper with vertical vents in the walls of the chamber (as opposed to a single vent at the very bottom) then it can double as a basic coffee roaster.
Fair warning: it'll make your popcorn taste odd, so considering buying a separate one. They're just $20 or so.
- Turn it on and wait for the air to get hot.
- Load about 3 oz of coffee and replace the top (including the butter tray).
- If the beans aren't circulating on their own, then agitate the popper by gently swirling it until they do. If they don't circulate after drying in the hot air for a minute or two, then use less coffee next time. If they're ricocheting around immediately, then use more.
- Look for first crack around 6-8 minutes. Fluid bed roasting (so called because the beans circulate not unlike a fluid) tends to be quite a bit faster than other methods.
Stovetop popcorn popper
Those old-fashioned stovetop popcorn poppers (the kind with a crank on top) are getting hard to come by...but they're surprisingly capable coffee roasters.
They're basically the skillet method, but with one huge upgrade: you get to turn a crank rather than shake a few pounds with unfavorable leverage for 10+ minutes.
- Preheat over medium to high heat for 3-4 minutes.
- Load roughly half a pound of green beans.
- Starting cranking at somewhere around 60-120 rpm. Some poppers have a gearing that doubles your hand's speed, so you might get there with just 30-60 rpm from the handle.
- As usual, aim for first crack by 10 minutes and second crack (if desired) a few minutes thereafter.