7 Steps To Great Pour-Over Coffee (The Beginner's Guide)
Brewing coffee looks so darn easy at your local hipster café, doesn't it?
Just grind a bit, pour a bit, wait a bit...and there you are. A fresh, complex cup of coffee from some exotic origin you've never even heard of.
So, naturally enough, you want to save the $5 a cup and create that amazing brew at home.
You're in luck, because it's a lot easier to do than you might think.
By the end of this article, you'll know:
- What equipment you need
- How to use it
- What to do when it doesn't taste quite right
And read on through, since I'll share my favorite way to find new coffees. (Just make sure you've got this brewing process down, first!)
Table of Contents
Get Fresh Beans
This probably goes without saying, but stale coffee tastes bad.
Unfortunately, nearly all coffee at the grocery store is stale. It may say it's good for several months yet, but that's just not the case. Instead, find something with a "roasted on" date of no more than a week ago, and preferably even less.
By the way, mass-market coffee tends to be roasted rather dark to cover up inconsistencies. That's true even when labeled as "medium" and the like. A local roaster will have far better, fresher options that get you much closer to the flavor of the hipster café's special of the day!
If you're new to higher-end coffee, then ask the barista for a recommendation. Don't worry about all the tasting notes that read line a wine label. Simple descriptors like "nutty" or "fruity" will help them point you in the right direction.
Invest In A Decent Grinder
All right, you've got great coffee on the counter, so time to throw some beans in that dinky little handheld blade grinder in the drawer, right?
Nope, not if you want it to taste halfway decent.
The thing is, blade grinders (and cheap burr grinders) don't grind coffee evenly. They leave a bad blend of tiny and huge pieces, which makes for uneven extraction and inconsistent, sub-par taste.
Instead, you'll want a quality burr grinder.
Worthwhile electric ones like the Baratza Encore start at roughly $150. But unless you need to grind several ounces at a time, I prefer a good manual grinder like the Timemore Chestnut C2 ( I reviewed a nearly identical model here).
Manual grinders have better burrs than electric ones at the same price point, since you're not paying for a motor. The burrs are what actually do the grinding, so it's the most cost-effective way to maximize grind consistency, extraction, and therefore taste.
Yes, cheaper options are available, but they're just not worth it. They cut the price through cheap burrs and wobbly construction that yield disappointing results.
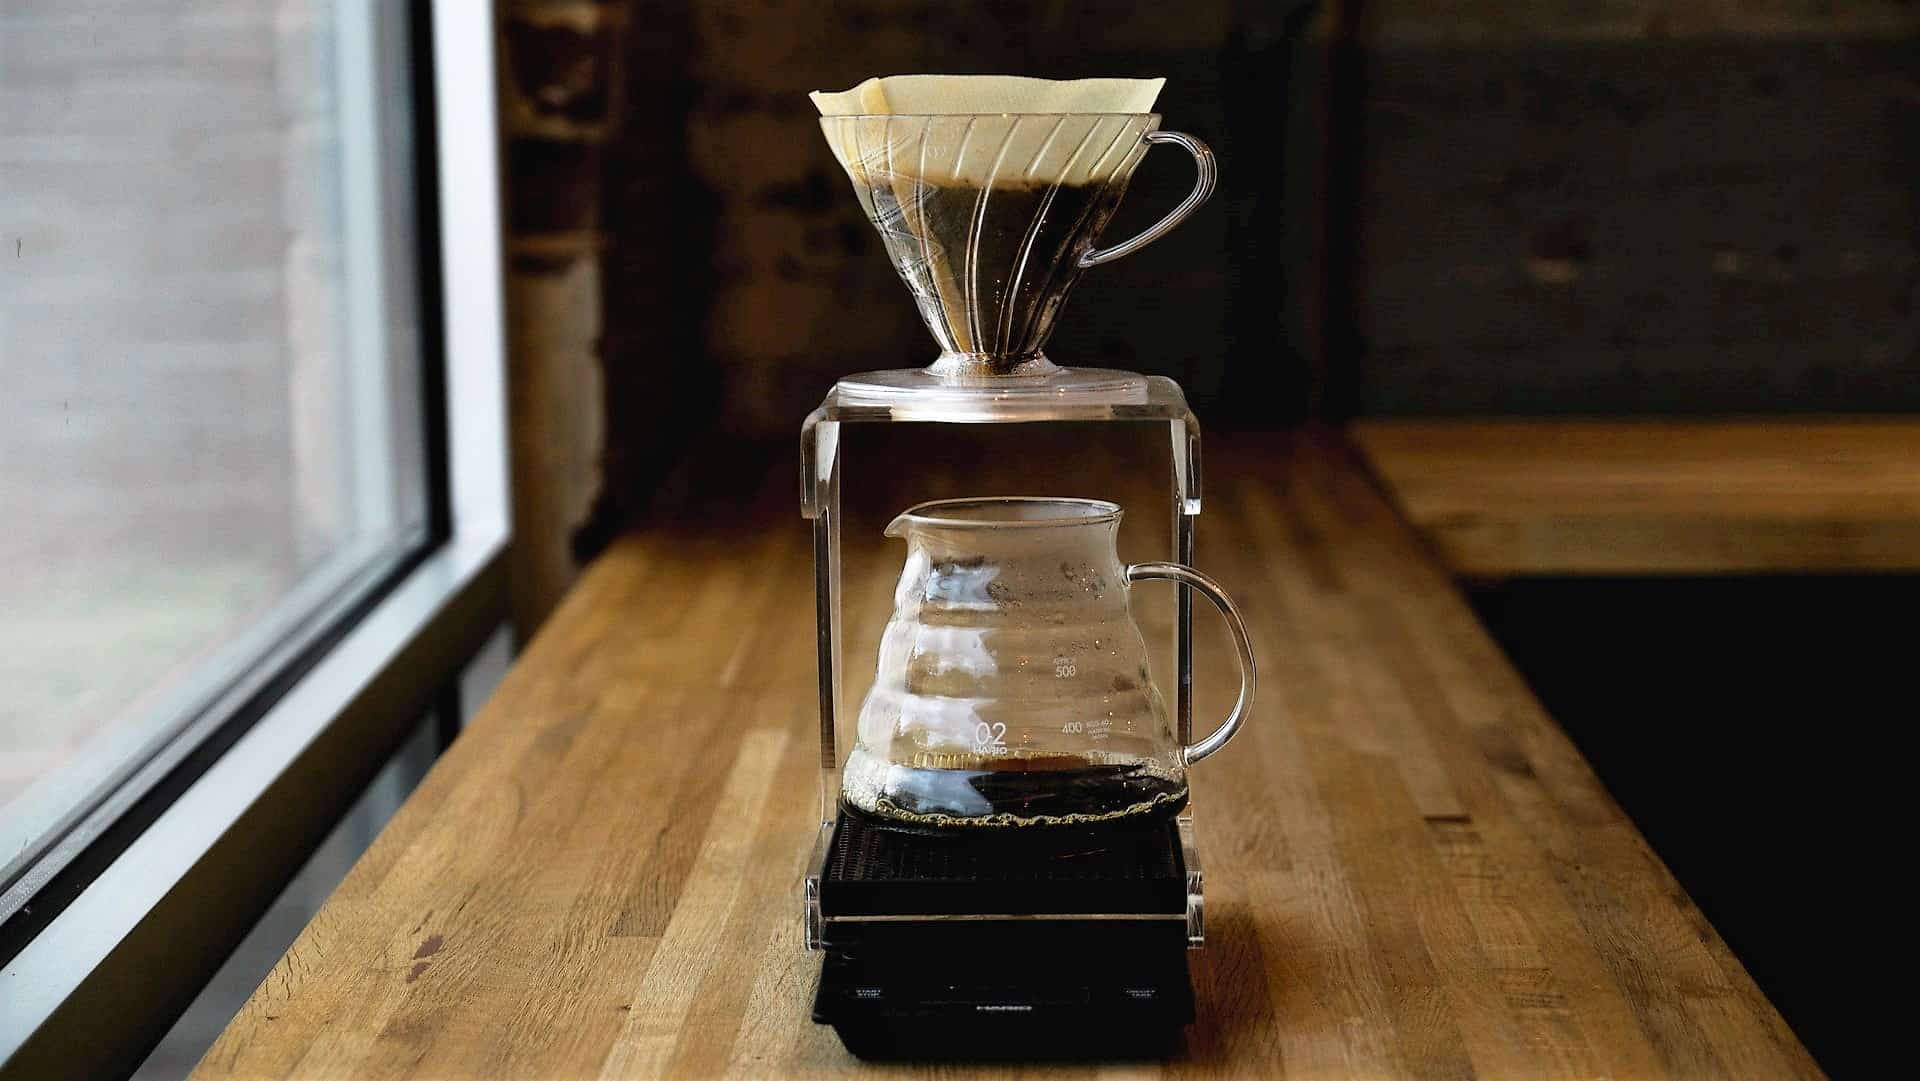
Buy A Basic Scale
Heads-up: your kitchen counter is going to look just a bit like a chemistry lab by the time we're done.
That's partly because the next must-have is a kitchen scale. You can go all-out on coffee-specific ones with 0.1g precision, like the beautiful Acaia Pearl line (available here from Prima Coffee).
But, realistically, any old kitchen scale with 1g precision will do the trick.
The whole point is to let you measure your coffee-to-water ratio quickly and consistently.
We'll come back to that later, but for now, suffice it to say that a scale makes life easier. Or, at least, it makes your coffee more consistent.
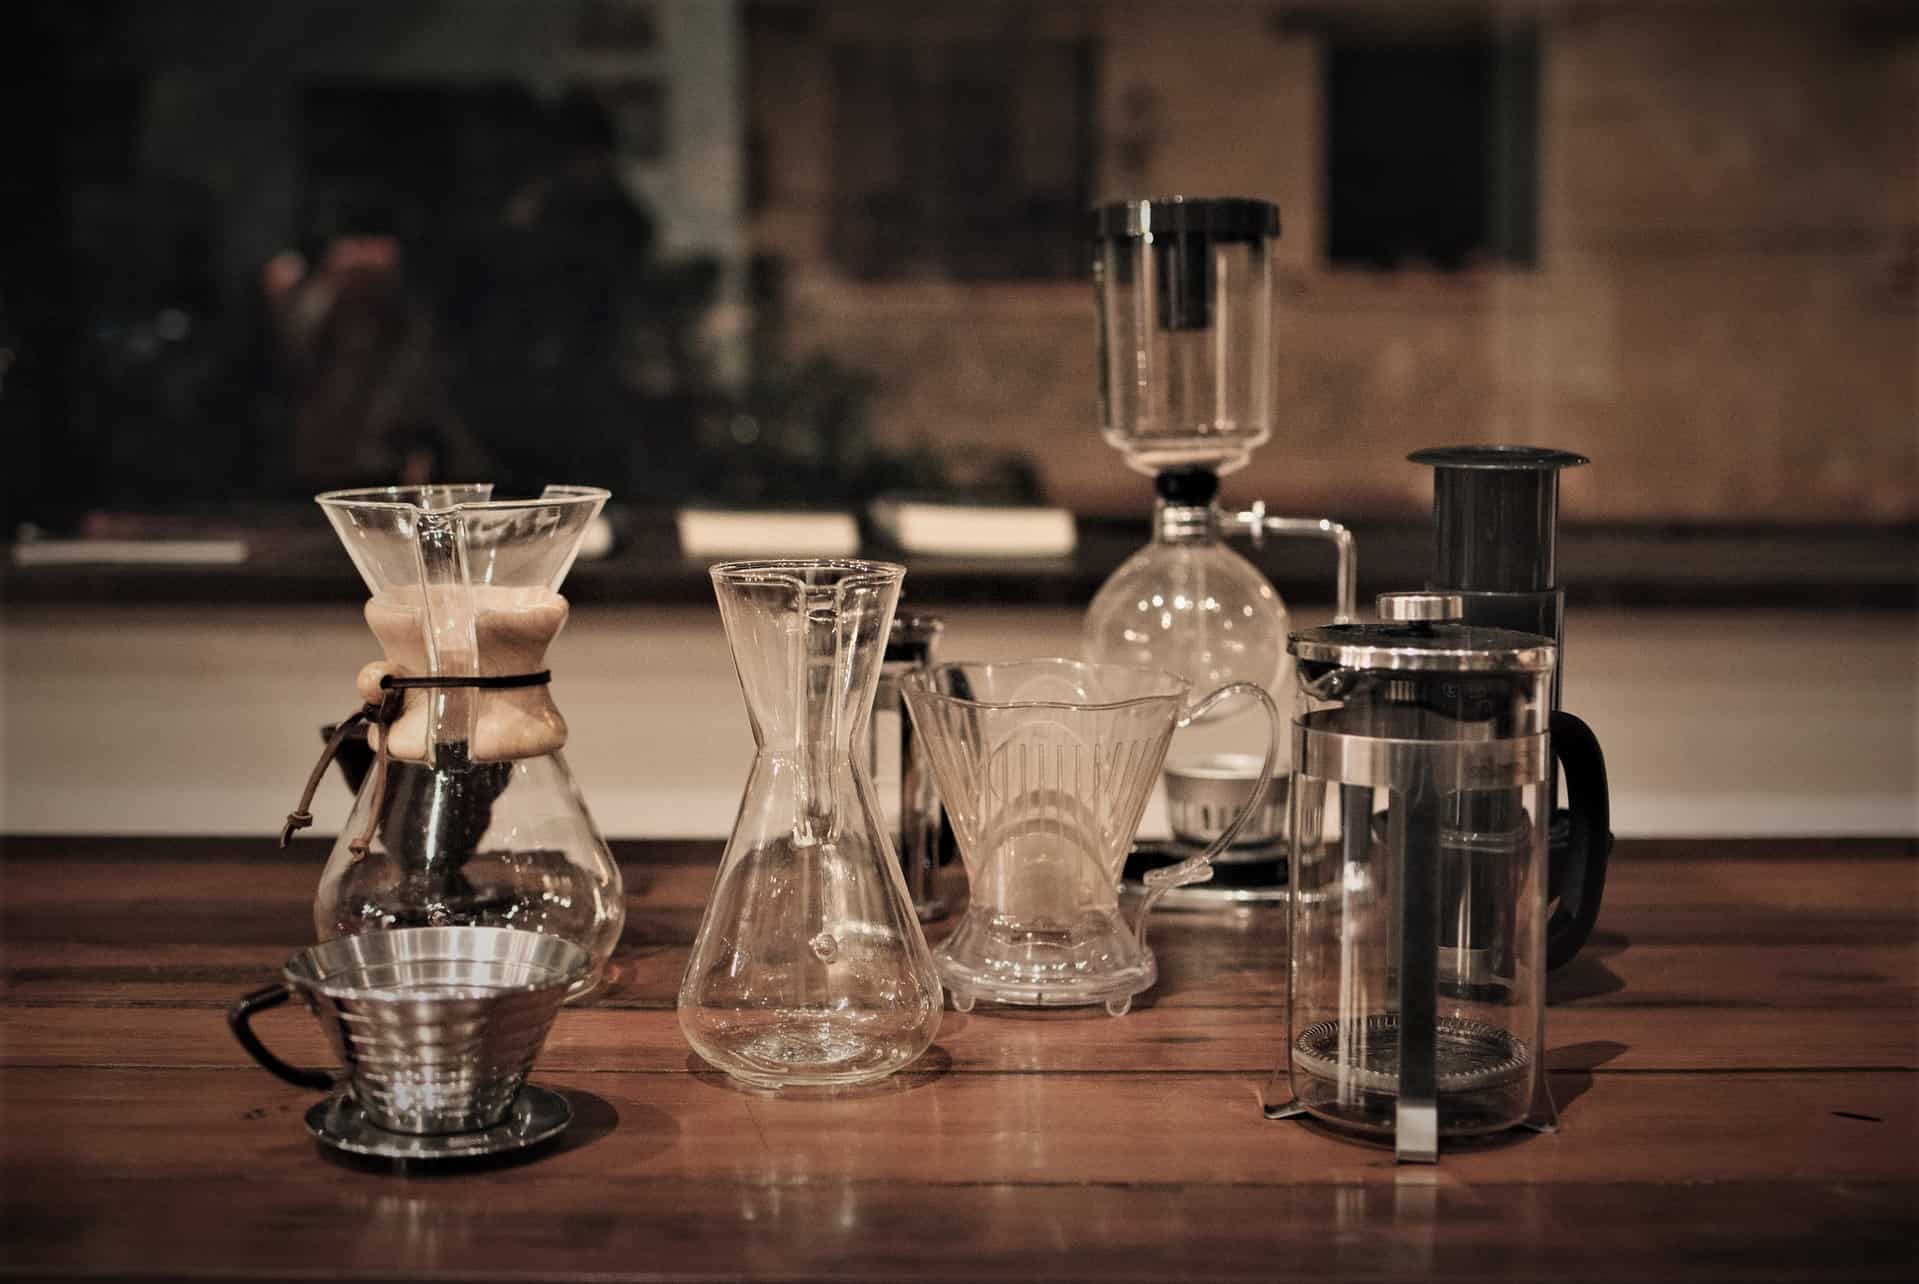
Pick A Pour-Over Device
The automatic coffee makers worth buying are awfully pricey. By virtue of their automation, they're also hard to experiment with, especially for smaller batches of just one or two servings.
Without a doubt, your money is better spent on a good grinder (which is helpful regardless of your brewing device).
Instead, you'll use whatever pour-over device you can easily find. The Hario V60 (get one here) and Melitta (get one here) are some of the easiest to find, but choices abound. The Melitta and related designs have very small openings, so they're sometimes easier for beginners to control.
In any case, I recommend a plastic dripper.
They're cheap, for one thing, often less than $10. But the best parts are:
- They don't need extensive preheating like ceramic (cold ceramic sucks heat out of the brewing coffee too quickly, so it's best to run a lot of hot water through ceramic first)
- They don't lose heat quickly like metal or glass
- They don't break as easily or dangerously as ceramic or glass
By the way, be sure to grab a couple packs of compatible filters while you're at it. Choose the bleached (white) paper if available. It imparts less taste than unbleached (brown) paper.
If you travel frequently, then the AeroPress is a terrific choice, too. It's not a pour-over device per se, since it steeps the coffee, but the results can be similar.
It's a clever invention that is versatile, fun to use, and ideal on the road as well. Check out my review if you're curious.
Consider A Gooseneck Kettle (Or This Cheaper Alternative)
Last time you were at your friendly neighborhood hipster café, you might have noticed the quirky kettle the barista used.
The long, curved neck is not some artisanal oddity, but a highly practical feature. It lets you pour very small amounts very precisely. That comes in handy when you need to pour just a few ounces of water over the course of 30+ seconds, and to do it evenly.
For the Melitta and similar brewers with tiny openings, it doesn't matter as much. But for a V60, with a large opening that could allow lots of water through, you'll be glad to have spent about $40 for a simple but well-designed stainless gooseneck kettle.
(I'm partial to the Fellow Stagg EKG electric kettle, available here. It's the best design on the market now, and I use it daily, but the price point might be hard for beginning baristas to swallow.)
If you're using an AeroPress, the water doesn't flow directly through at all, so any old kettle will work just fine.
In a pinch, you can simply use any large (2+ cups) measuring cup, as long as it pours precisely enough for whatever brewing device you have. It's harder to use than a gooseneck kettle, but can still do the job. Just make sure to preheat it with hot water. Otherwise, a cold vessel will cool your brewing water too quickly.
(By the way, the Hario Air kettle is essentially a measuring cup that still has a gooseneck-like spout. You'll still need to preheat it, but it's a bargain--and quite travel-friendly. It's not widely available but at least one retailer in Canada sells it online.)
Measure And Grind
All right, you've got the gear, so let's try brewing.
We're going to start with a ratio of 16 grams of water per 1 gram of coffee for pour-over. You can and should experiment with more or less water, for a weaker or stronger brew, respectively.
This is just a starting point that is unlikely to steer you wrong.
To get a roughly average serving, start with 224g water and 14g coffee. That yields around 200g or 7oz. But heat at least twice that much water, since you need to preheat the brewer and pre-wet the filter, too.
(If you're using an AeroPress or other immersion brewer, a ratio of about 14:1 may work better. That's 16g coffee for the same 224g water.)
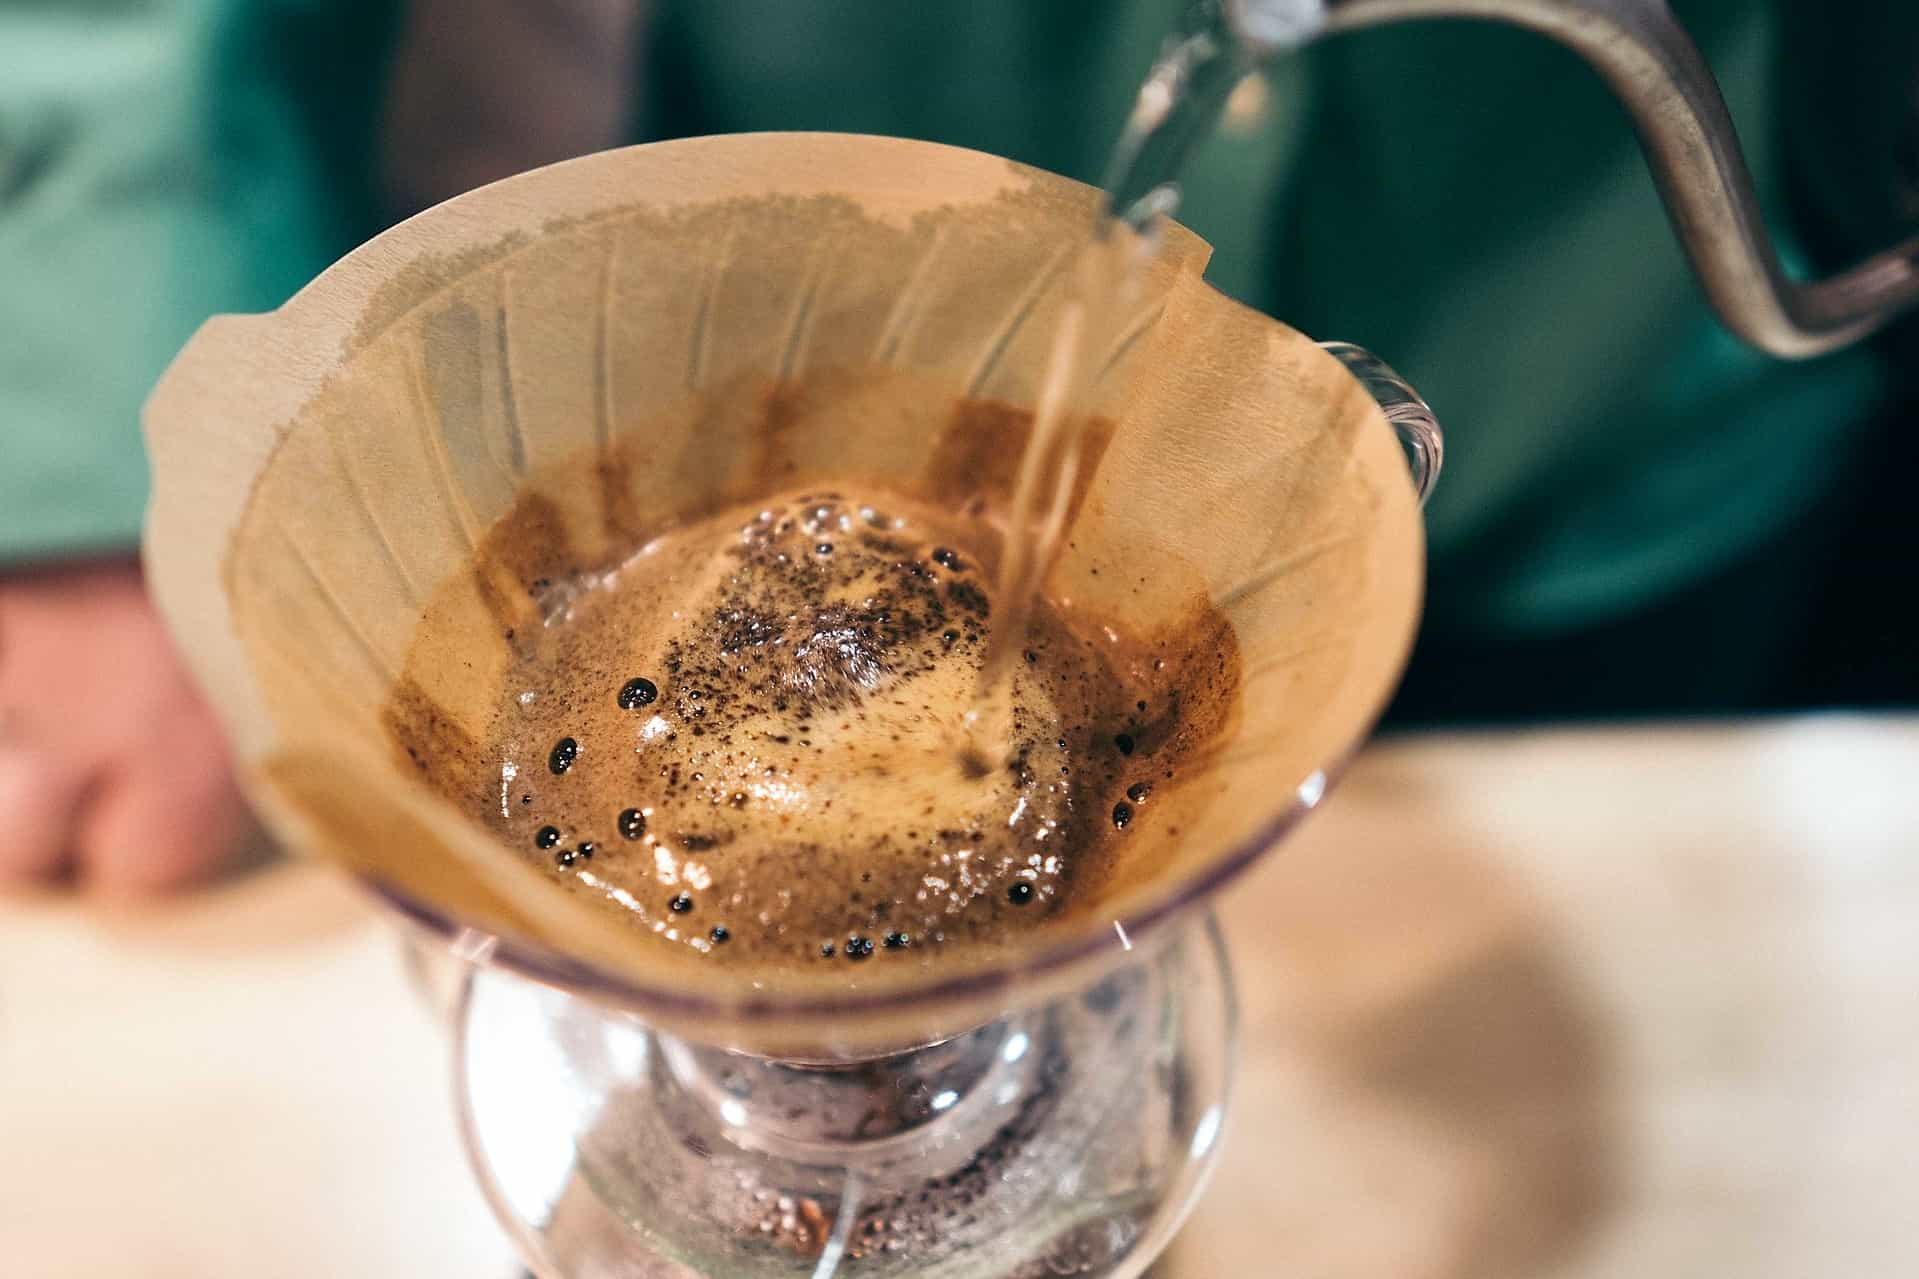
"Bloom" And Brew
Whatever instructions come with your brewing device should be enough. Some manufacturers suggest rather odd ratios, though, so start with the ones recommended here, and adjust to taste.
Generally speaking, here's the process for almost any pour-over device. This does not apply to an AeroPress, French press, or other immersion brewer, which are fundamentally different.
- While the water heats, place the brewer on a mug and the filter in the brewer.
- Get the water to about 200F. It's easier with an adjustable kettle, of course. But with a regular kettle, just turn off the heat once it reaches a boil, and let it sit. (Note: if you'll pour from a decanter or pitcher, then keep the water at a full boil. It cools rapidly when you fill the decanter/pitcher.)
- Use some of the water to wet the filter and fill the mug perhaps halfway to preheat it.
- Let it sit for at least 15 or 30 seconds, then empty out the water, taking care not to dislodge the filter.
- Pour your ground coffee into the brewer, set it all on your scale, and zero out the scale.
- If you're pouring from something besides a stovetop kettle, then decant the boiling water into it now.
- Gently pour water up to about twice the coffee's weight. In this case, that's roughly 28g. Fresh coffee may expand, which is called "blooming." (Note that this is part of your total 224g of water, so do not zero the scale again!)
- Swirl it around until all the coffee grounds are evenly wet, then let it just sit on the scale for 15 seconds or so.
- Over the course of another 15-30 seconds, add water gently (in a spiral around the bed of coffee) until you hit a total of 224g.
- As the water level falls, swirl very gently a few times to sweep the grounds off the sides of the brewer.
- When all the water has disappeared, wait another few seconds for the last few drops, then discard the ground and filter, and turn off your scale.
- Let the coffee cool for at least a minute or two, depending on your mug. That might sound a little odd, but it's because it's hard to notice certain pleasant flavors when the coffee is still scalding hot.
- If it took more than about 2.5-3 minutes from the first pour until the last drop, try a coarser grind next time. Likewise, if it took less than 1.5-2 minutes, or just tastes weak, then try a slightly finer grind.
That sounds like a lot to remember, but once you've gone through the process a few times, it's second nature.
If these instructions aren't totally clear, then YouTube will be your best friend. Just avoid any complicated method with several rounds of pouring and waiting, and pouring and waiting. In my experience, they're not worth the fuss.
This video from James Hoffman, a well-known barista, is extremely helpful. My approach is largely based on his.
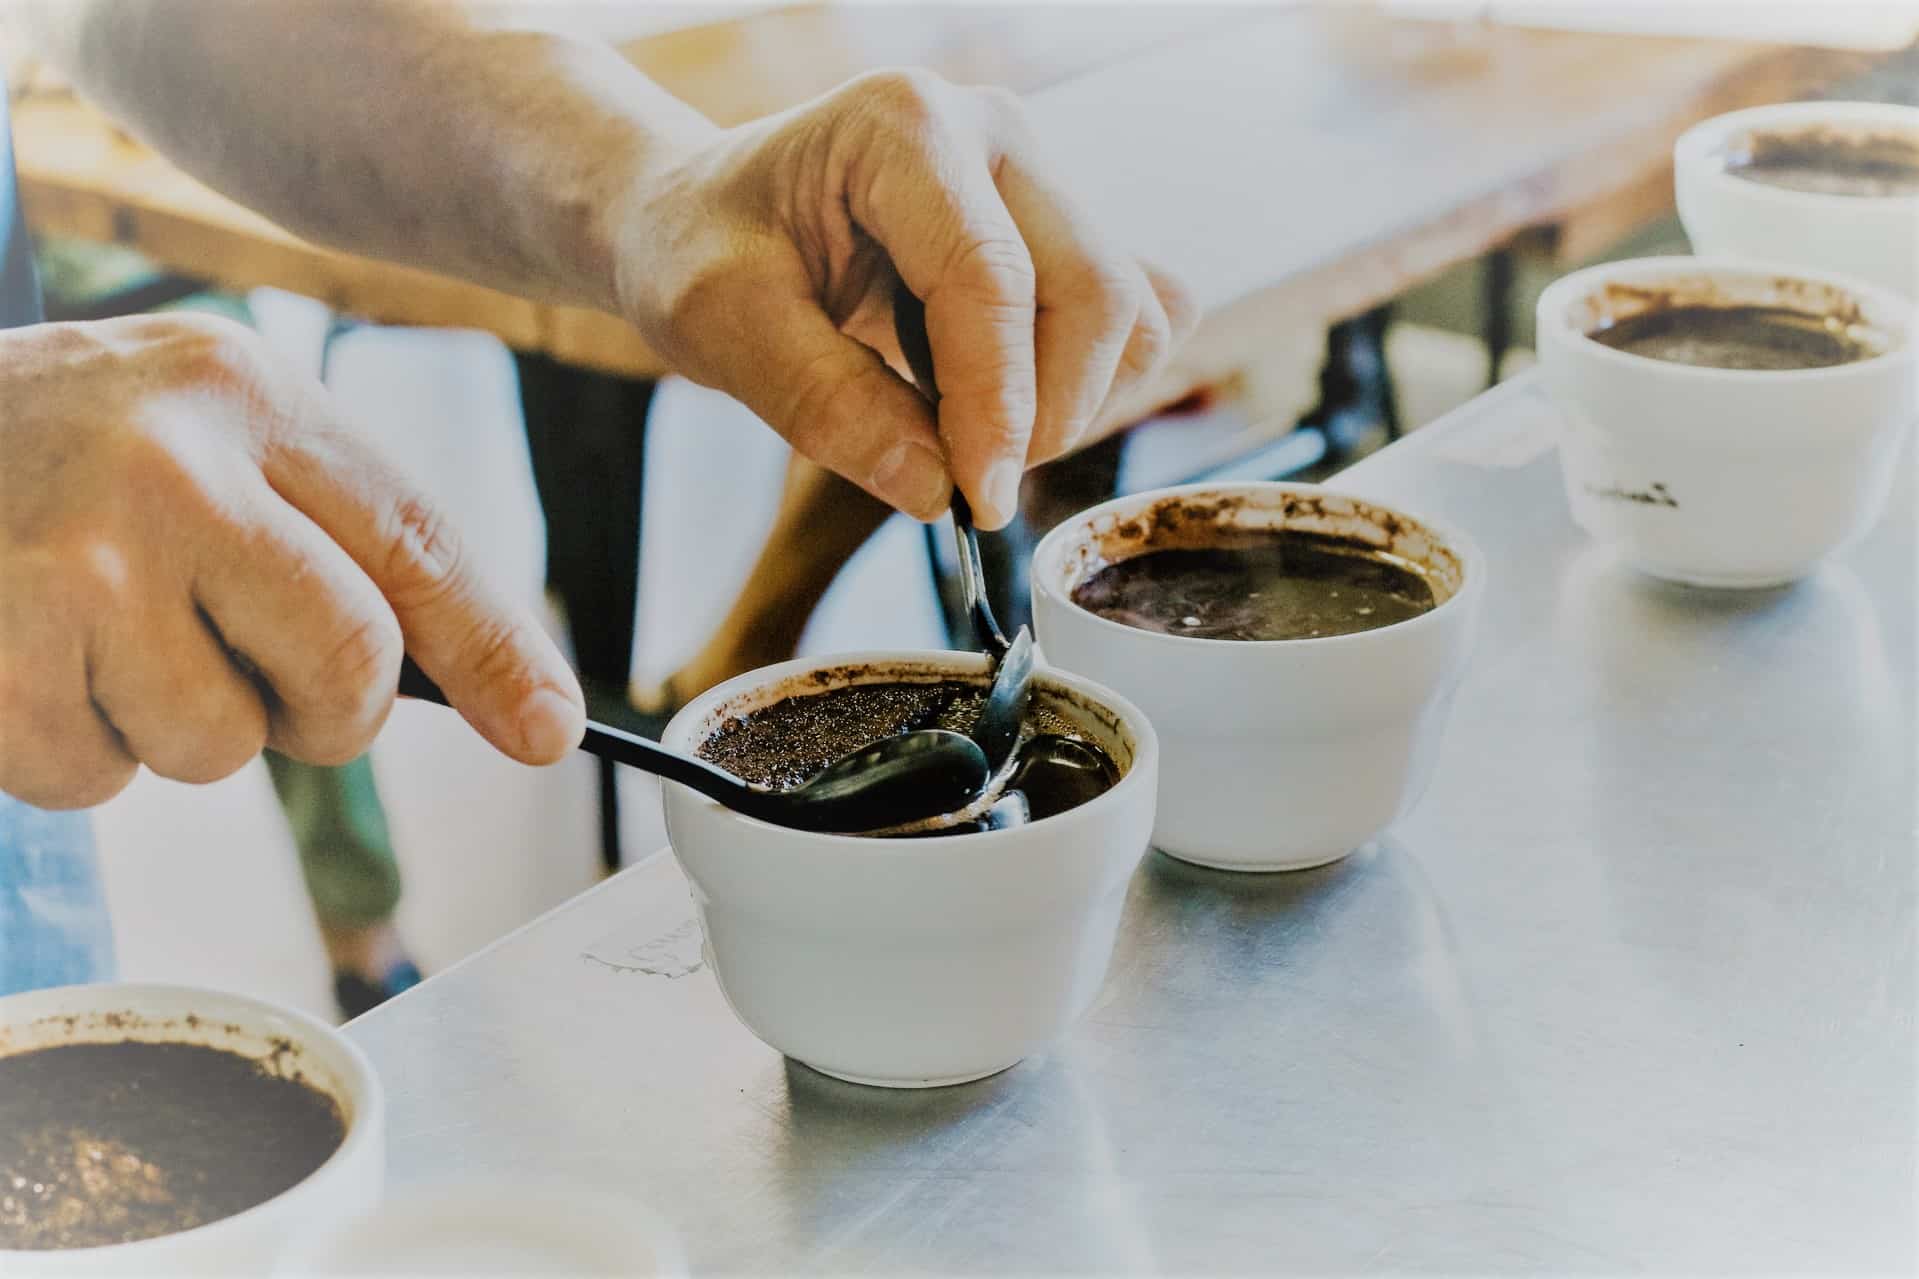
What To Do If Your Coffee Tastes Off
Odds are your first few attempts (at least) won't taste quite like you expected. Part of the reason your hipster café charges a hefty chunk of change is that making great pour-overs is somewhat of a skill.
However, with practice, it's a skill that anyone who passed middle-school science can nail.
The most important part is to understand what to do about "off" flavors in your coffee.
Firstly, make sure the coffee is fresh, high-quality, not very dark-roasted, and ground right before brewing with a good grinder, and brewed with the right amount of water.
It's worth making sure those are all true before "troubleshooting" too much further.
But if it's still not quite to your taste, then the ingenious Coffee Compass is here to save the day.
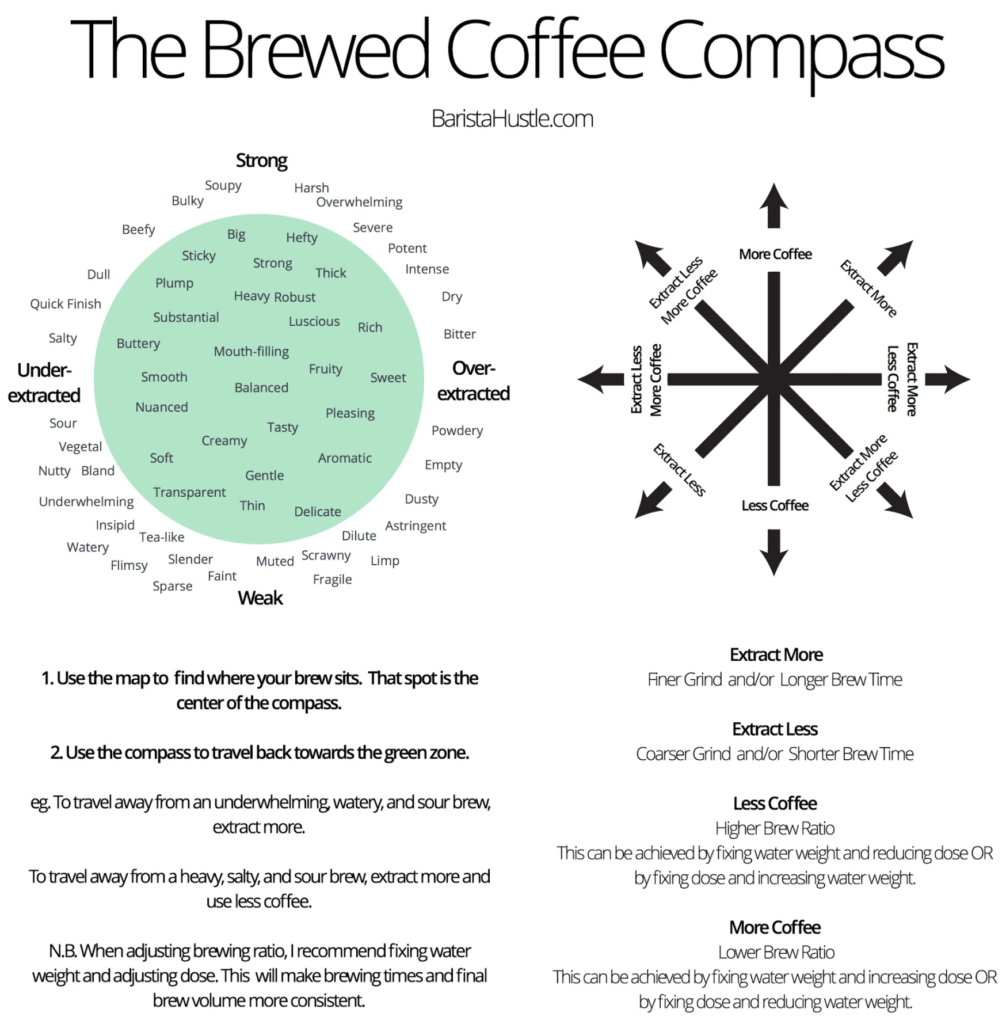
(Source: Barista Hustle)
All you need to do is identify what you dislike about the taste. Match that dislike to one of the words outside the green circle.
From there, follow whichever arrow points back to the center. It tells you exactly how to grind, measure, or brew differently to fix it.
It's surprisingly simple with practice, and it eventually becomes intuitive.
And that is when you know you've mastered pour-over brewing!
P.S. If this was helpful, then be sure to check out my Angels' Cup review. They send a blind tasting kit each month, selected from specialty roasters around the US (including some great ones I'd never even heard of). As soon as you're brewing consistently good coffee, it gets interesting and fun to taste all the variety you can!